Staph Helicase
Dataset
Part One: Setup
Ensure you have created a location to keep track of CryoSPARC projects:
| Title | Value |
|---|---|
| Title | |
| Description | Leave empty |
| Directory | |
| Create Workspace | Enable |
| Workspace Title | Leave default |
There is prepared refinement job that we will import into the project. It was exported from a different CryoSPARC instance and transferred onto the local SSD of your EC2 instance.
- Navigate to the project directory:
-
Make a new directory called
importsand navigate into it: - Move J154_new_local_refine
Navigate to the workspace you just created, click on the dropdown next to 'New Job', select 'Import Job' and fill out the corresponding absolute path. Yous should see the completed Local Refine job in the workspace:
| Import Path | Job Type | Imported Job Title |
|---|---|---|
| Local Refinement | None |
Part Two: 3DVA Exploratory Analysis
- Input: local refine particles
| Parameter | Value |
|---|---|
| Fourier crop | |
| Save results in 16-bit: True | True |
| Num threads |
- Input: particles from downsample & mask from local refine
| Parameter | Value |
|---|---|
| Modes | |
| Filter resolution (A) |
- Input: particles & components from 3DVA
| Parameter | Value |
|---|---|
| Mode | Simple |
- Input: particles & components from 3DVA
| Parameter | Value |
|---|---|
| Mode | Cluster |
| Number of frames/clusters | |
| Only use these components |
- Input: particles from 3DVA
| Parameter | Value |
|---|---|
| Subset by | |
| 3DVA Component Number | |
| Subsetting mode | |
| Number of Gaussians |
- Inputs: Subset Particles Particle Set 1
| Parameter | Value |
|---|---|
| Symmetry |
- Inputs: Subset Particles Particle Set 2
| Parameter | Value |
|---|---|
| Symmetry |
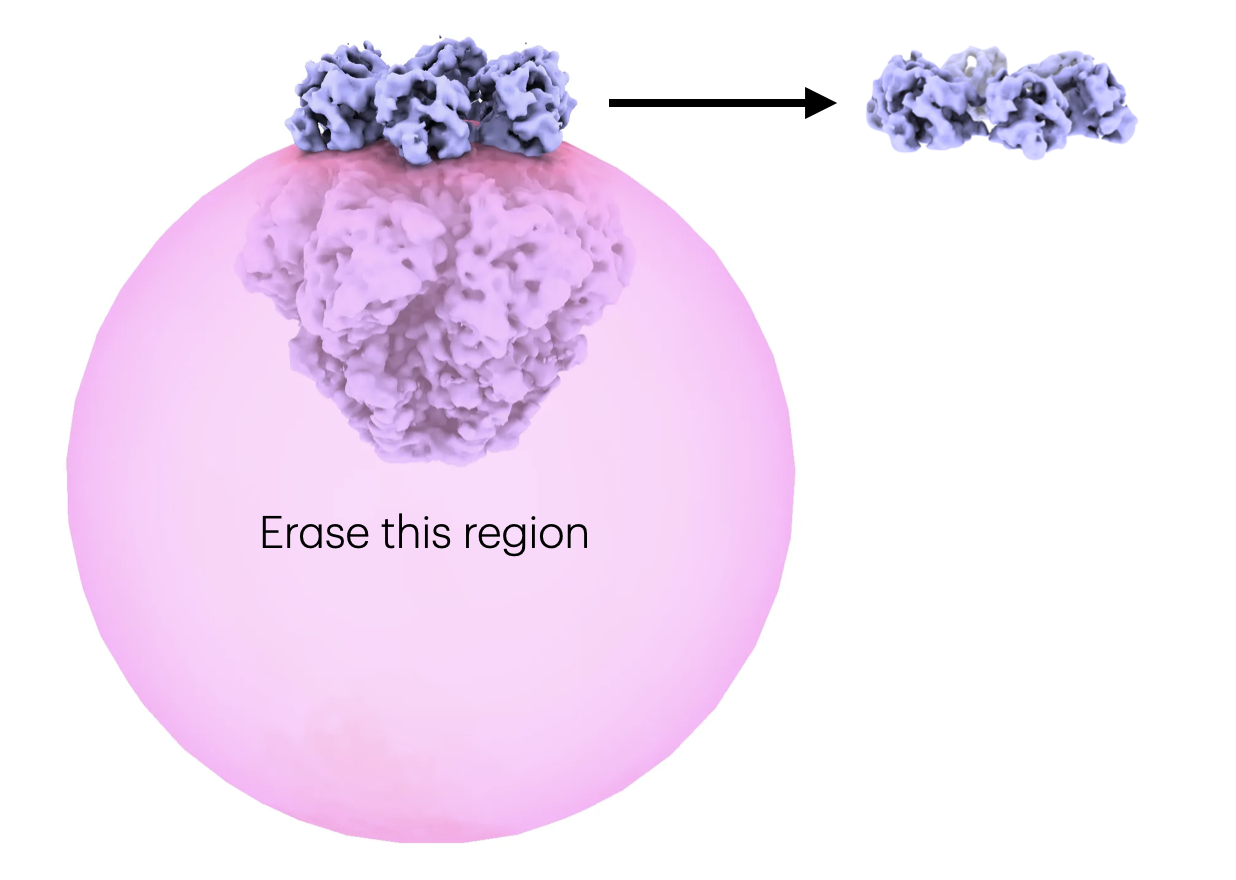
Part Three: Focussed 3D Classification for Compositional Heterogeneity
Remove everything but the CTD with the volume eraser tool in UCSF ChimeraX. Save the CTD volume as an MRC file on your local device.
Drag and drop the
.mrc
file into the browser. Ensure the correct project is selected and click 'Upload'. Once complete you can copy the absolute path of the file to use in the next step.
Import the corresponding volume from the previous step.
| Parameter | Value |
|---|---|
| Volume path | Path to mrc uploaded locally (this will be within your project directory) |
| Type of volume being imported | Mask |
- Inputs: volume from import 3D volumes
| Parameter | Value |
|---|---|
| Type of input volume | |
| Type of output volume | |
| Threshold (must set to process mask) | |
| Dilation radius | |
| Soft padding width |
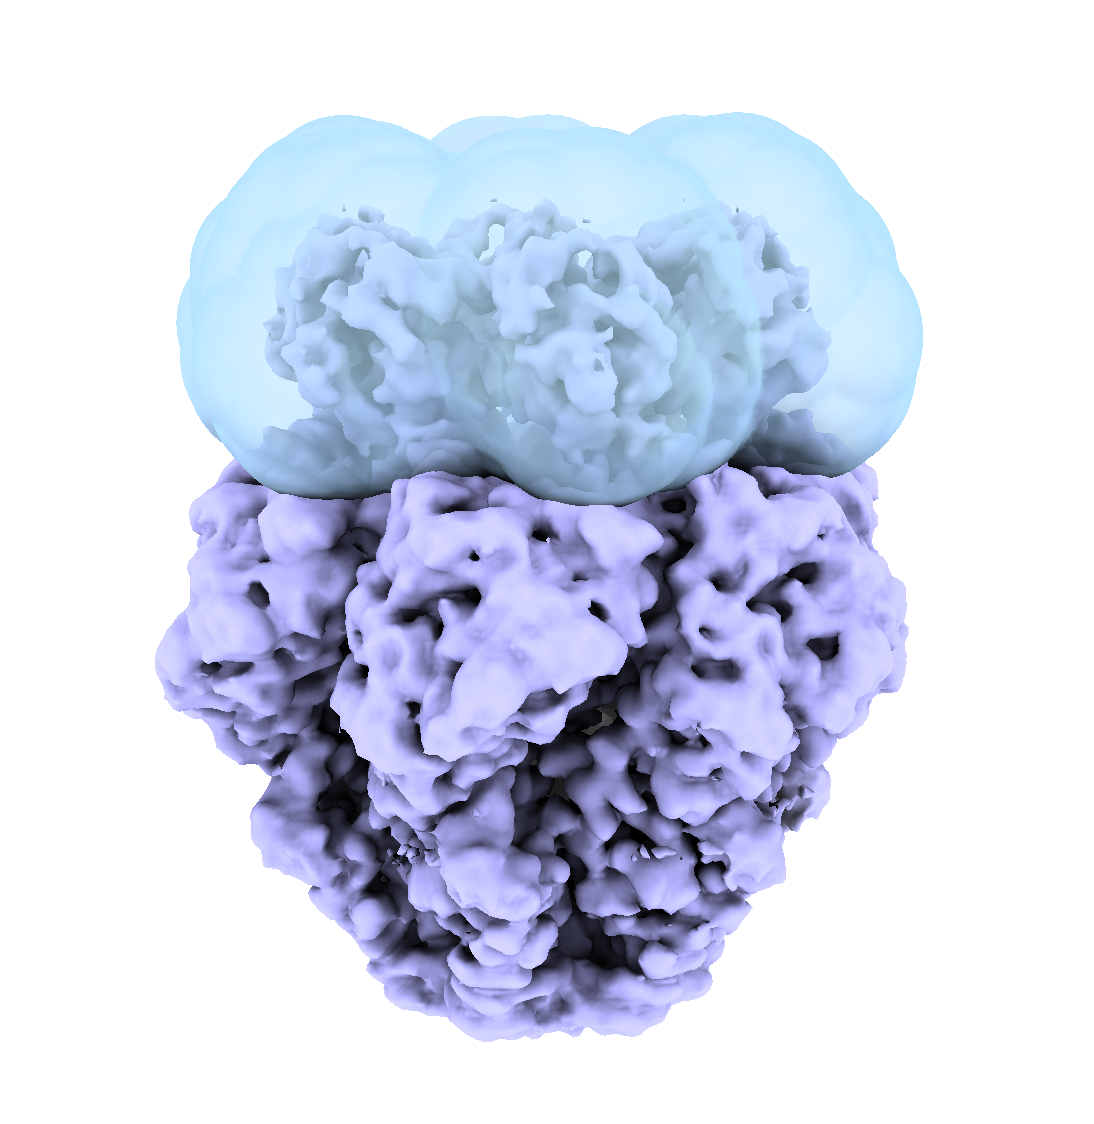
Visualize the mask together with the locally refined volume in UCSF ChimeraX.
- Inputs: particles from downsample job, mask from volume tools, solvent mask from local refine
| Parameter | Value |
|---|---|
| Number of classes | |
| Filter resolution (A) | |
| O-EM batch size | |
| O-EM learning rate |
Part Four: 3D Flex with the CTD volume class
Input Particle stacks: particles from Homogeneous Reconstruct 2 Input Initial volume: volume from Homogeneous Reconstruct 2
Default parameters
- Load the consensus volume from Data Prep
- Use the segger tool to create 3 segments
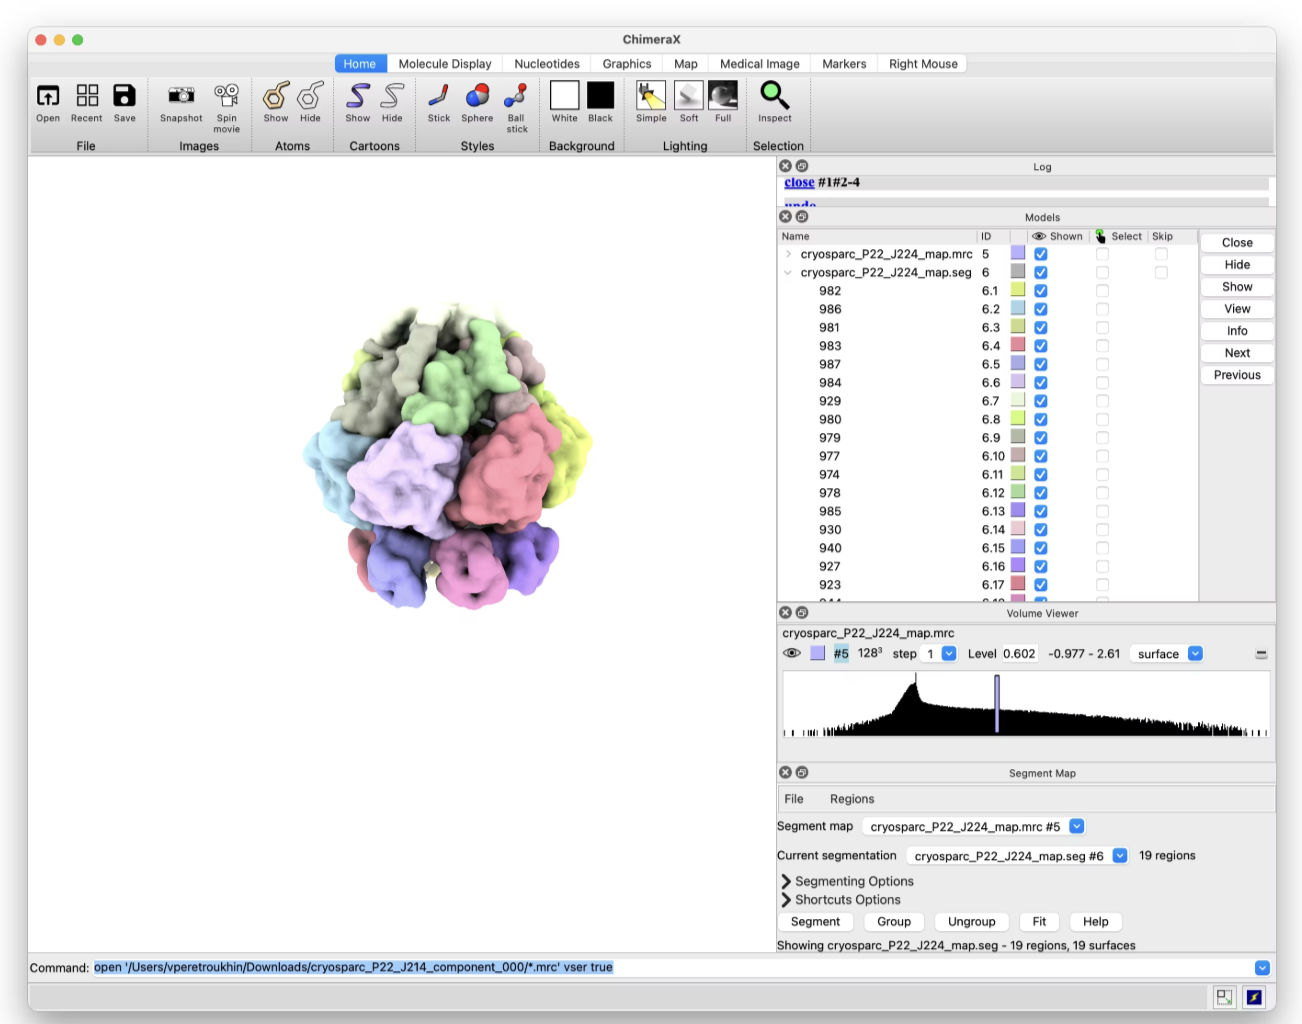
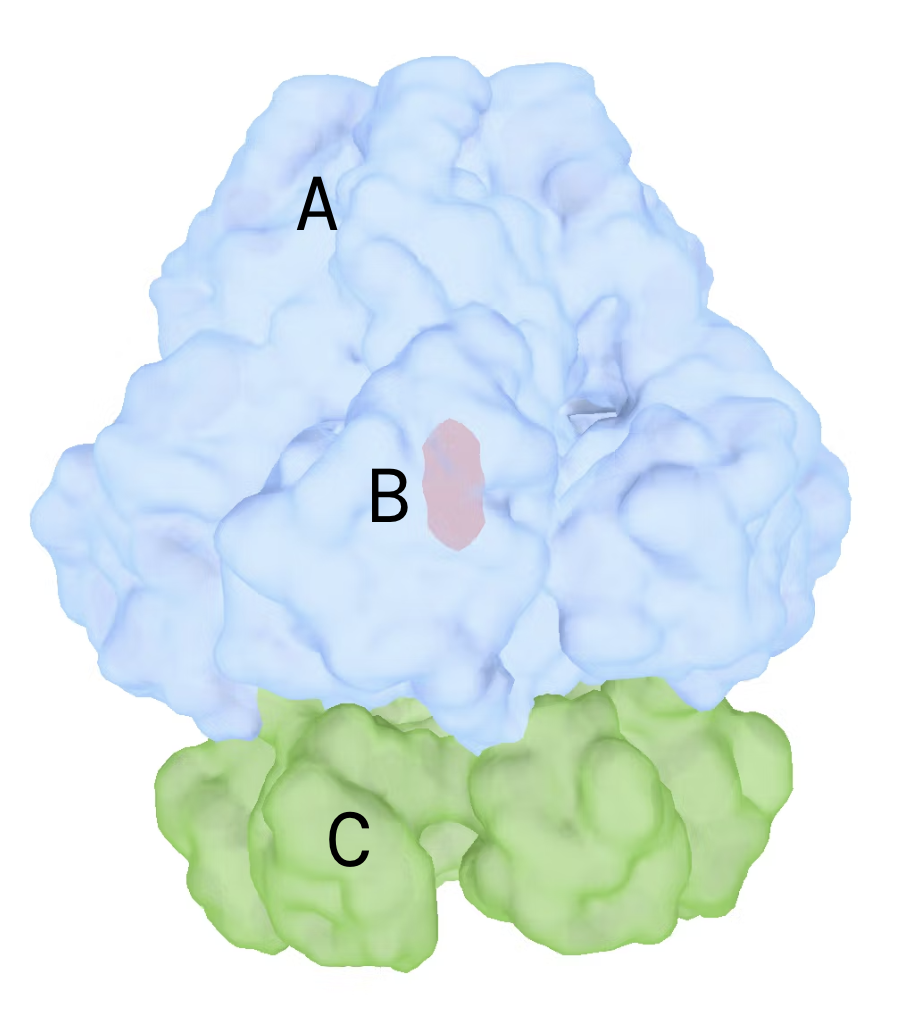
- Note the segment IDs for regions A, B, C
-
Save as
3Dflex_10881_3part.seg
Drag and drop the
.seg
file into the browser. Ensure the correct project is selected and click 'Upload'. Once complete you can copy the absolute path of the file to use in the next step.
| Parameter | Value |
|---|---|
| Segmentation file path | |
| Segment connections | (replace A,B,C with segment ids above) |
The job should take ~10 seconds to complete.
Use default parameters
Create a 3D Flex Generate job to visualize the results of the 3D Flex Training.
Input: results from 3D Flex Training job Input: volume from Non-Uniform Refinement job
Run the job after 300 iterations. Ensure you select the job, enable the 'build' mode and use the 'Queue' button. Once the queue dialog appears, select the 'Run on specific GPU' tab and check the single GPU available on the instance. Click 'Queue Job' to launch the job immediately. This will allow you to run the job without waiting for the training job to complete.
Expected results:
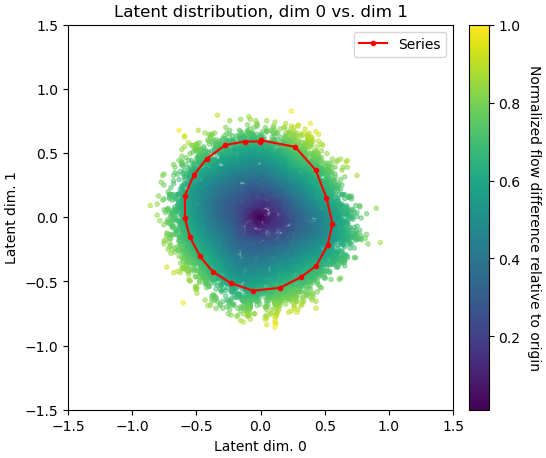
Part Five: Custom Trajectory
On AWS:
Locally:
-
-
Replace
EC2_INSTANCE_URLwith your instance's public URL or IP address. - Password to authenticate into the EC2 instance:
-
Replace
- In your browser, navigate to http://localhost:53000
- Password:
- Now create a new notebook
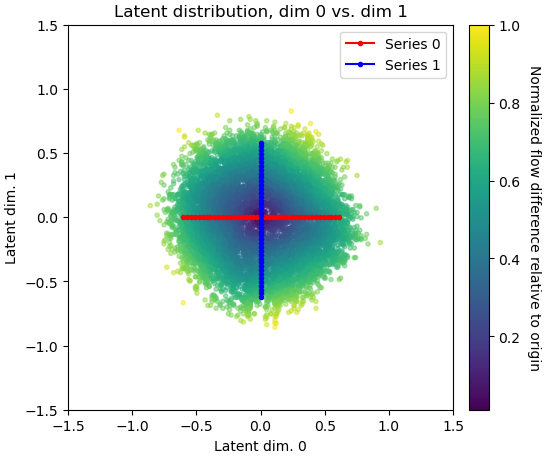
Follow the CryoSPARC tools notebook to create external job with custom latents.
CryoSPARC Tools NotebookNow that you have the custom latents, you can generate a 3D Flex model using the Flex Generate job using the following inputs:
- Input: Flex Train job
- Input: Latent coordinates from the external job
Expected results: